Saturday, February 15, 2025

Baked Spicy Chicken Sandwiches

This isn't the best picture, but this is worthy of a blog post because it's a keeper!  The original recipe comes from the blog Budget Bytes and uses chicken breast but I used chicken thighs that I had on hand. It's a recipe for 2 servings but could easily be adapted to make as many as you need.  

I made the slaw with a fresh head of cabbage instead of the bagged cabbage I usually use.  It was creamy, crunchy, and so much better than the bagged slaw.  I don't think I'll ever go back to using the bagged slaw again!   

This was a picture before baking. You'll see the process below but to the crumb mixture you add a little avocado oil which makes the crumb mixture like sand.  Once the chicken is coated with a yogurt mixture the crumb mixture adheres to the chicken nicely and when baked it became a crispy and crunchy piece of chicken without being fried.

Ingredients: 


  • 1/2 cup plain breadcrumbs 
  • 1/4 tsp garlic powder 
  • 1/2 tsp smoked paprika 
  • 1/2 tsp cayenne (use 1/4 if you don't want it spicy)
  • 1/8 tsp salt 
  • freshly cracked pepper 
  • 1 & 1/2 Tbsp cooking oil
  • 1/4 cup plain yogurt
  • 1/8 tsp salt 
  • 1 tsp hot sauce 
  • boneless, skinless small chicken breast or thighs (if needed cut chicken pieces to fit your bun and freeze or use the trimming for another use) (I cooked up the trimmings the next day and added to our lunch salads)

Honey Yogurt Slaw (this will give you enough to top two sandwiches and two side servings)

  • 3 cups shredded cabbage(or pre-bagged slaw mix) 
  • 2 Tbsp mayonnaise 
  • 1/3 cup plain whole milk yogurt 
  • 1/2 Tbsp honey 
  • 1 tsp Dijon mustard 
  • 1 tsp apple cider vinegar 
  • 1/4 tsp salt 
  • freshly cracked pepper 

For Serving

  • 2 brioche buns (optional- toast)

Instructions

    • Preheat the oven to 425ºF. Place a wire cooling rack over a baking sheet to hold the breaded chicken.  I also like to cover the baking sheet with foil for easy clean up.
    • In a wide shallow bowl or container, combine the bread crumbs, garlic powder, smoked paprika, cayenne, salt, and some freshly cracked pepper for the chicken's breading. Once combined, add the cooking oil and stir until the seasoned breadcrumbs resemble damp sand.
    • In a separate wide shallow bowl or container, combine the yogurt, salt, and hot sauce.
    • Place the chicken breast on a cutting board, cover with plastic, then use a mallet or rolling pin to gently pound the chicken breast to an even thickness, no more than 3/4-inch thick. Cut the chicken breast to fit the size of the bun, then season with a pinch of salt and a pinch of cayenne.
    • At this point you can dip each piece of chicken into the yogurt and hot sauce mixture, making sure to fully coat the chicken, then into the seasoned bread crumbs, again coating both sides. Place the coated chicken on the prepared baking sheet with wire rack.  Or if you have time marinate the chicken in the yogurt mixture (up to 8 hours) before baking.  Especially with chicken breast as it tenderizes and will result in a juicer piece of chicken.
    • Bake the chicken for 25 minutes, or until the internal temperature reaches 165ºF, carefully flipping the chicken once half way through. 
    • While the chicken is baking, prepare the honey yogurt slaw. In a small bowl stir together the mayonnaise, yogurt, honey, Dijon, vinegar, salt, and some freshly cracked pepper. 
    • Place the shredded cabbage slaw mix in a large bowl, pour the prepared dressing over top, and stir until the cabbage is coated in dressing.
    • Once the chicken is finished baking, build the sandwiches. Place one piece of spicy chicken on each bun and top with a generous pile of the honey yogurt slaw. Enjoy!


Friday, February 7, 2025

Yogurt (cold start instant pot)

I posted this yogurt recipe back in 2020 and have been making it ever since on repeat.  When I can find a recipe that not only tastes better than store bought, is cheaper to make from scratch and to top it off is easy to make, it's a keeper!  If you do make this yogurt, you might want to make my granola too.  It's another recipe that's a keeper and has a place in my panty at all times!


There are so many recipes and information for instant pot yogurt on the internet, it will make your head spin!  I settled on making the cold start method as it seemed the easiest.  This is the first recipe I tried and it turned out perfect.  Why try any other, one and done!  It's from the blog, Pipping Hot Curry.  Below I'm going to share the exact ingredients and instructions I use but if you need any more info check out Pipping Hot Curry.  She goes into detail about the kind of milk, starter, and sweetener you must use for cold start to turn out.  


*Very important before starting - sterilize your pot first.  It's not enough to just clean because you never want your yogurt tasting like last night's dinner.  I even went as far as purchasing a designated pot just for yogurt.  To sterilize, you simply pour boiling water in the inner pot and discard it or pressure cook one cup water one minute to sanitize.  I'm not sure if this matters but I always make sure my pot is back to room temperature before I start.  Being a cold start method I don't want to start it out in a hot pan.  

ingredients:


  • 52-ounce Fairlife Whole Milk (You have to use Ultra Processed Milk and this Brand is the one I always use)
  • 2 tablespoons Fage Yogurt (*see note below)
  • 1/2 can Eagle Brand Sweetened Condensed Milk

Instructions

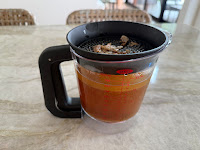
  • Add milk, yogurt and 1/2 can sweetened condensed milk to Instant Pot insert. Whisk together very well to incorporate completely.
  • Place on instant pot lid or a glass lid.  (It doesn't pressure cook so you can use any lid)
  • Push the Yogurt button and use the +/- buttons and set time to 8 hours. (mine automatically sets for 8 hours)
  • When the yogurt cycle is completed and the Instant Pot beeps, DON'T (**see note) stir but carefully remove the lid not letting the condensation drip into the yogurt.  Remove the inner pot and cover with plastic wrap and refrigerate overnight before serving.  (**see note) 
  • Enjoy yogurt with your favorite flavor and toppings. 

Note

*Don't let the rest of the Fage yogurt go to waste, you can eat it, put it in a smoothie or portion out couple portions (2 Tablespons each) and freeze in a small container or ziplock bag to use for your next batch of yogurt.  Freezing the yogurt won't kill the cultures you need to make your next batch of yogurt.


**The yogurt needs to set overnight in the fridge to cool, set up and thicken so don't be tempted to stir or serve right away!


Thursday, February 6, 2025

Apple Bacon Gruyere Pizza


 When my husband told me about the pizza he was going to make for dinner, I wasn't thinking I would like it.  But, when he cooks dinner he can make whatever he wants! I was pleasantly surprised, we both loved it!  This pizza is layered with a delicious creamy béchamel sauce, thinly sliced apples, crispy bacon and melty Gruyere cheese.   Gruyere cheese is a little pricey but worth the flavor it brings.  After you remove pizza from the oven a sprinkle of thyme is a perfect touch. 
You won't believe how delicious it is!

Recipe adapted from the blog Cooking with Carlee

This brand is our go to for pizza dough.  I love a short cut and once we found this freezer dough we stopped trying to make my own.  It's made in Michigan and sold mainly in the midwest at Woodman's, Hy-Vee, Kroger, Mariano's and Meijer.

Thawing Instructions 

Remove dough from freezer and place into refrigerator overnight in package. Dough will expand in the bag. (Dough can be used up to 4 days after removing from freezer if kept in refrigerator until use.)

Once the dough has thawed take out if bag and place in a lightly greased bowl and cover with towel or lid, let dough come to room temperature (about 1 1/2 hours or longer if your house is cold) before using. It rolls out easily if it’s at room temperature. It will also rise more during this time. 

Thawing instructions from frozen to use same day
(Ready in 4-6 hours)
Let thaw in the package or lightly greased bowl covered with towel or lid for (4-6 hours) or until dough is at room temperature and soft.


Servings: 1 pizza 8 slices

Ingredients


Dough for 1 pizza crust

2 Tablespoons butter

2 Tablespoons all-purpose flour

1 cup whole milk

1 Tablespoon Dijon mustard

salt and pepper

8 slices bacon cooked crispy

1 apple cored and thinly sliced

8 oz Gruyere cheese

1 Tablespoon fresh thyme


Instructions


Preheat your oven to 450°F and preheat your pizza stone.


In a saucepan, melt the butter over medium heat. Whisk in the flour and continue to cook for a minute or two. You don’t want it to take on much color, just cook the flour flavor out.


Pour in the milk and continue to whisk and cook until it thickens. Remove from heat and stir in the mustard. Adjust the salt and pepper to taste.


Flour dough lightly and lightly shape dough with hands and stretch to size.  (we like to assemble the pizza on parchment for easier transfer, but use whatever method you’d like.)


Top dough with mustard béchamel. Cover with grated Gruyere. Arrange thinly slice apples and chopped bacon over cheese and bake for about 15 minutes.


Remove from oven and sprinkle with fresh thyme. Slice and enjoy!

Tuesday, November 26, 2024

Trailblazer Bites - Trader Joe’s


These trailblazer bites are made with just 6 wholesome ingredients, almonds, Medjool dates, almonds butter, oats, flaxseed meal and dark chocolate.  I got the recipe from Trader Joe's website and you can purchase every ingredient from Trader Joe's too.  Of course you don't have to use TJ's products as you can find these ingredients at any grocery store.
  
The Medjool dates and almond butter make these energy balls deliciously sweet.  They are quick and easy to make in the food processor, and they keep for weeks in the fridge or freezer.  They can be enjoyed for breakfast, snack or dessert.

When making for the grandkids I replace the dark chocolate with raisins or craisins.  They love them!  


1/2 cup TJ's Raw Almonds
1 cup (10-12)  TJ's Organic Pitted Medjool Dates **see note
2 Tablespoons TJ's Organic Flaxseed Meal
1/2 cup TJ's Creamy Salted Almond Butter *see note
1/2 cup Old-fashioned oats (not instant)
1/3 cup dark Chocolate chips, chopped or chopped dark chocolate bar

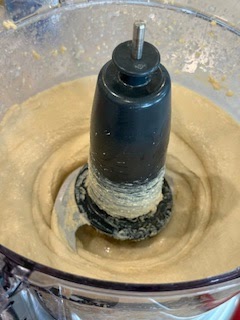
1.  Combine all the ingredients in the food processor and pulse until ingredients are combined and finely crumbled and moist enough to form into balls. If balls are too crumbly add more almond butter and pulse until you get a consistency to form into balls.

2.  Scoop and form mixture into desired size balls,  I like golfball size.  Enjoy immediately or store bites in airtight container in fridge.  Can also be stored in freezer, thaw and enjoy. 

Notes

*I like to use Trader Joe's Creamy Salted Almond butter but if you don't have a TJ's close to you use creamy almond butter with a smooth consistency to make this recipe.
**If your dates are hard and dry, soak them in hot water for 10 minutes and drain well.  Also if they're not pitted, remove pits before making.


Wednesday, September 11, 2024

Shimp Roll


I LOVE Trader Joes.  When I go I always find something new to buy along with all our favorites.  At the bottom of the post I share a few of my favorites. 
I had never heard of red shrimp until a few days ago when my sister in law, Judy, mentioned that she ordered some from a seafood vendor and they were so good.  So when I saw red shrimp at Trader Joes I picked up a 1 lb. bag ($11.99).  Not sure what I was going to do with them until the next day when I was in search for what to make for lunch.  In the freezer I saw some leftover hotdog buns and then the red shrimp and thought lobster roll, except with shrimp!  I didn't have time to thaw in the fridge so I just placed in a strainer and ran cold water for a few minutes to thaw.  Then I diced into small pieces and sautéed in a little butter.  These raw shrimp being pink already looked cooked but it only took a few minutes.  Of course I had to sample them warm.  OMG, these were so tender, sweet and did remind me a little of lobster.  I then put into the fridge to cool.  I don't have any measurements to share as I just used enough shrimp for two sandwiches.  Once the shrimp were cool, I added mayo (I'll use less next time), diced celery, diced onion, salt and pepper.  I kept it simple and will make it again but next time I might add a little old bay spice to the shrimp before sautéing.  Also if I happen to have some chives or dill, or maybe some lemon juice, that would be good too!  Also I will butter and toast the buns.  I'll be making these again so I'll post back with measurements and any additions that would make this shrimp roll even better than it was today.  


I fill my cart at Trader Joes with all sorts of goodies, like flowers, produce, wine, cheese but here are some of my favorite things I always have in my cart. 

I always have to stock up on their coconut chips and nuts for my homemade granola that I make on repeat.

This Kung Pao Chicken and Vegetable Fried Rice makes for a quick delicious meal.  Quicker than getting takeout!
We treat ourselves to dark chocolate after our meals and these are always one of our choices!
                       
We love this peanut butter, it's simple and is simply delicious!  There are two ingredients, peanuts and salt.  That is all!  Great with sliced apples!  

What's not to like, peanut butter and pretzels!
                                                                                                               

Monday, September 9, 2024

Granola

I published this recipe back in 2019 and it has been one recipe I make over and over again!  When one batch is gone I make another!  I even have a designated basket that holds all the ingredients in my pantry which makes it easy to grab the basket and pull this recipe together quickly.  It's loaded with oats, nuts, and coconut, with a touch of maple flavor and has big crunchy clusters.  It's good sprinkled on yogurt or even by the handful.  The best part is it's easy to make.  Okay, the best part is eating it by the handful! 


In my pantry I keep all the ingredients in this basket except for  maple syrup is in the fridge and I keep nuts fresh in the freezer once opened.
This is the coconut I've been buying at Trader joes, coconut chips.  At other grocery stores I sometime see it called coconut flakes. This is the  texture you'll want, thinly shaved pieces of coconut.  Also I like to buy my nuts at Trader Joes as the prices are great!


I came across liquid coconut oil recently and I like to use it instead of the solid coconut oil as it's so much easier to measure.


  • INGREDIENTS:
  • 1 1/2 cups old fashioned rolled oats (NOT instant)
  • 1/2 cup unsweetened coconut chips or flakes (large chips/flakes DO NOT used shredded, it will burn)
  • 1/2 cup slivered raw almonds *see note
  • 1/2 cup raw pecan halves or walnuts *see note
  • 1 Tbsp brown sugar (light or dark)
  • 1/2 tsp cinnamon
  • pinch sea salt (or kosher salt)
  • 3 Tbsp coconut oil
  • 1/3 cup real 100% PURE maple syrup (only use the real maple syrup)
  • 1 tsp pure vanilla extract
 
Instructions:
  1. Preheat oven to 325 degrees. VERY IMPORTANT - Line a large baking sheet with parchment paper or it will stick to the pan, set aside.
  2. Add oats, coconut and nuts to a large mixing bowl and stir to combine.
  3. To a  small microwave-safe bowl ( I used a glass measuring cup) add brown sugar, cinnamon, salt, coconut oil, maple syrup; stir and heat for 45 seconds.  Stir.  If not totally combined put in the microwave 20 seconds more and mix. Add vanilla and mix again.
  4. Immediately pour over the dry ingredients and lightly stir to combine until all oats and nuts are thoroughly coated. Arrange on a large baking sheet (covered with parchment paper) and spread into an even layer.
  5. Bake for 10 minutes, turning the pan around (so it bakes evenly) and bake 10 minutes more.   Watch carefully so it doesn't burn.  Everyone's oven is different so if you may need a few less or more minutes. Do not stir!!  You'll know it's done when the granola is golden brown.
  6. Do not stir!  Let it cool COMPLETELY before breaking into clusters.

  7. Store in a sealed bag or container at room temperature for up to 3 weeks.
      
    *Add any combination of (unsalted) nuts/seeds that you like, walnuts, pumpkin seeds, slivered almonds,  or pecans.