Showing posts sorted by relevance for query granola. Sort by date Show all posts

Tuesday, July 2, 2019

Granola

I published this recipe back in 2019 and it has been one recipe I make over and over again!  When one batch is gone I make another!  I even have a designated basket that holds all the ingredients in my pantry which makes it easy to pull this recipe together quickly.  It's loaded with oats, nuts, and coconut, with a touch of maple flavor and has big crunchy clusters.  It's good sprinkled on yogurt or even by the handful.  The best part is it's easy to make.  Okay, the best part is eating it by the handful! 


This is the coconut I've been buying at Trader joes, coconut chips.  At other grocery stores I sometime see it called coconut flakes. This is the  texture you'll want, thinly shaved pieces of coconut.  Also I like to buy my nuts at Trader Joes as the prices are great!


I like to use the liquid coconut oil instead of the solid as it's so much easier to measure.


  • INGREDIENTS:
  • 1 1/2 cups old fashioned rolled oats (NOT instant)
  • 1/2 cup unsweetened coconut chips or flakes (large chips/flakes DO NOT used shredded, it will burn)
  • 1/2 cup slivered raw almonds *see note
  • 1/2 cup raw pecan halves or walnuts *see note
  • 1 Tbsp brown sugar (light or dark)
  • 1/2 tsp cinnamon
  • pinch sea salt (or kosher salt)
  • 3 Tbsp coconut oil
  • 1/3 cup real 100% PURE maple syrup (only use the real maple syrup)
  • 1 tsp pure vanilla extract
 
Instructions:
  1. Preheat oven to 325 degrees. VERY IMPORTANT - Line a large baking sheet with parchment paper or it will stick to the pan, set aside.
  2. Add oats, coconut and nuts to a large mixing bowl and stir to combine.
  3. To a  small microwave-safe bowl ( I used a glass measuring cup) add brown sugar, cinnamon, salt, coconut oil, maple syrup; stir and heat for 45 seconds.  Stir.  If not totally combined put in the microwave 20 seconds more and mix. Add vanilla and mix again.
  4. Immediately pour over the dry ingredients and lightly stir to combine until all oats and nuts are thoroughly coated. Arrange on a large baking sheet (covered with parchment paper) and spread into an even layer.
  5. Bake for 10 minutes, turning the pan around (so it bakes evenly) and bake 10 minutes more.   Watch carefully so it doesn't burn.  Everyone's oven is different so if you may need a few less or more minutes. Do not stir!!  You'll know it's done when the granola is golden brown.
  6. Do not stir!  Let it cool COMPLETELY before breaking into clusters.

  7. Store in a sealed bag or container at room temperature for up to 3 weeks.
      
    *Add any combination of (unsalted) nuts/seeds that you like, walnuts, pumpkin seeds, slivered almonds,  or pecans.


Monday, September 9, 2024

Granola

I published this recipe back in 2019 and it has been one recipe I make over and over again!  When one batch is gone I make another!  I even have a designated basket that holds all the ingredients in my pantry which makes it easy to grab the basket and pull this recipe together quickly.  It's loaded with oats, nuts, and coconut, with a touch of maple flavor and has big crunchy clusters.  It's good sprinkled on yogurt or even by the handful.  The best part is it's easy to make.  Okay, the best part is eating it by the handful! 


In my pantry I keep all the ingredients in this basket except for  maple syrup is in the fridge and I keep nuts fresh in the freezer once opened.
This is the coconut I've been buying at Trader joes, coconut chips.  At other grocery stores I sometime see it called coconut flakes. This is the  texture you'll want, thinly shaved pieces of coconut.  Also I like to buy my nuts at Trader Joes as the prices are great!


I came across liquid coconut oil recently and I like to use it instead of the solid coconut oil as it's so much easier to measure.


  • INGREDIENTS:
  • 1 1/2 cups old fashioned rolled oats (NOT instant)
  • 1/2 cup unsweetened coconut chips or flakes (large chips/flakes DO NOT used shredded, it will burn)
  • 1/2 cup slivered raw almonds *see note
  • 1/2 cup raw pecan halves or walnuts *see note
  • 1 Tbsp brown sugar (light or dark)
  • 1/2 tsp cinnamon
  • pinch sea salt (or kosher salt)
  • 3 Tbsp coconut oil
  • 1/3 cup real 100% PURE maple syrup (only use the real maple syrup)
  • 1 tsp pure vanilla extract
 
Instructions:
  1. Preheat oven to 325 degrees. VERY IMPORTANT - Line a large baking sheet with parchment paper or it will stick to the pan, set aside.
  2. Add oats, coconut and nuts to a large mixing bowl and stir to combine.
  3. To a  small microwave-safe bowl ( I used a glass measuring cup) add brown sugar, cinnamon, salt, coconut oil, maple syrup; stir and heat for 45 seconds.  Stir.  If not totally combined put in the microwave 20 seconds more and mix. Add vanilla and mix again.
  4. Immediately pour over the dry ingredients and lightly stir to combine until all oats and nuts are thoroughly coated. Arrange on a large baking sheet (covered with parchment paper) and spread into an even layer.
  5. Bake for 10 minutes, turning the pan around (so it bakes evenly) and bake 10 minutes more.   Watch carefully so it doesn't burn.  Everyone's oven is different so if you may need a few less or more minutes. Do not stir!!  You'll know it's done when the granola is golden brown.
  6. Do not stir!  Let it cool COMPLETELY before breaking into clusters.

  7. Store in a sealed bag or container at room temperature for up to 3 weeks.
      
    *Add any combination of (unsalted) nuts/seeds that you like, walnuts, pumpkin seeds, slivered almonds,  or pecans.


Wednesday, September 11, 2024

Shimp Roll


I LOVE Trader Joes.  When I go I always find something new to buy along with all our favorites.  At the bottom of the post I share a few of my favorites. 
I had never heard of red shrimp until a few days ago when my sister in law, Judy, mentioned that she ordered some from a seafood vendor and they were so good.  So when I saw red shrimp at Trader Joes I picked up a 1 lb. bag ($11.99).  Not sure what I was going to do with them until the next day when I was in search for what to make for lunch.  In the freezer I saw some leftover hotdog buns and then the red shrimp and thought lobster roll, except with shrimp!  I didn't have time to thaw in the fridge so I just placed in a strainer and ran cold water for a few minutes to thaw.  Then I diced into small pieces and sautéed in a little butter.  These raw shrimp being pink already looked cooked but it only took a few minutes.  Of course I had to sample them warm.  OMG, these were so tender, sweet and did remind me a little of lobster.  I then put into the fridge to cool.  I don't have any measurements to share as I just used enough shrimp for two sandwiches.  Once the shrimp were cool, I added mayo (I'll use less next time), diced celery, diced onion, salt and pepper.  I kept it simple and will make it again but next time I might add a little old bay spice to the shrimp before sautéing.  Also if I happen to have some chives or dill, or maybe some lemon juice, that would be good too!  Also I will butter and toast the buns.  I'll be making these again so I'll post back with measurements and any additions that would make this shrimp roll even better than it was today.  


I fill my cart at Trader Joes with all sorts of goodies, like flowers, produce, wine, cheese but here are some of my favorite things I always have in my cart. 

I always have to stock up on their coconut chips and nuts for my homemade granola that I make on repeat.

This Kung Pao Chicken and Vegetable Fried Rice makes for a quick delicious meal.  Quicker than getting takeout!
We treat ourselves to dark chocolate after our meals and these are always one of our choices!
                       
We love this peanut butter, it's simple and is simply delicious!  There are two ingredients, peanuts and salt.  That is all!  Great with sliced apples!  

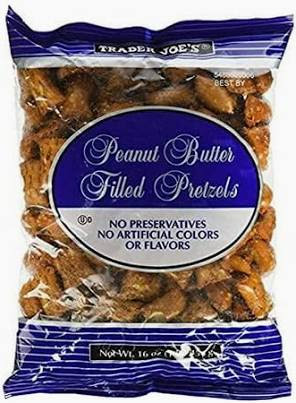
What's not to like, peanut butter and pretzels!
                                                                                                               

Friday, February 7, 2025

Yogurt (cold start instant pot)

I posted this yogurt recipe back in 2020 and have been making it ever since on repeat.  When I can find a recipe that not only tastes better than store bought, is cheaper to make from scratch and to top it off is easy to make, it's a keeper!  If you do make this yogurt, you might want to make my granola too.  It's another recipe that's a keeper and has a place in my panty at all times!


There are so many recipes and information for instant pot yogurt on the internet, it will make your head spin!  I settled on making the cold start method as it seemed the easiest.  This is the first recipe I tried and it turned out perfect.  Why try any other, one and done!  It's from the blog, Pipping Hot Curry.  Below I'm going to share the exact ingredients and instructions I use but if you need any more info check out Pipping Hot Curry.  She goes into detail about the kind of milk, starter, and sweetener you must use for cold start to turn out.  


*Very important before starting - sterilize your pot first.  It's not enough to just clean because you never want your yogurt tasting like last night's dinner.  I even went as far as purchasing a designated pot just for yogurt.  To sterilize, you simply pour boiling water in the inner pot and discard it or pressure cook one cup water one minute to sanitize.  I'm not sure if this matters but I always make sure my pot is back to room temperature before I start.  Being a cold start method I don't want to start it out in a hot pan.  

ingredients:


  • 52-ounce Fairlife Whole Milk (You have to use Ultra Processed Milk and this Brand is the one I always use)
  • 2 tablespoons Fage Yogurt (*see note below)
  • 1/2 can Eagle Brand Sweetened Condensed Milk

Instructions

  • Add milk, yogurt and 1/2 can sweetened condensed milk to Instant Pot insert. Whisk together very well to incorporate completely.
  • Place on instant pot lid or a glass lid.  (It doesn't pressure cook so you can use any lid)
  • Push the Yogurt button and use the +/- buttons and set time to 8 hours. (mine automatically sets for 8 hours)
  • When the yogurt cycle is completed and the Instant Pot beeps, DON'T (**see note) stir but carefully remove the lid not letting the condensation drip into the yogurt.  Remove the inner pot and cover with plastic wrap and refrigerate overnight before serving.  (**see note) 
  • Enjoy yogurt with your favorite flavor and toppings. 

Note

*Don't let the rest of the Fage yogurt go to waste, you can eat it, put it in a smoothie or portion out couple portions (2 Tablespons each) and freeze in a small container or ziplock bag to use for your next batch of yogurt.  Freezing the yogurt won't kill the cultures you need to make your next batch of yogurt.


**The yogurt needs to set overnight in the fridge to cool, set up and thicken so don't be tempted to stir or serve right away!


Monday, August 9, 2021

Peach and Strawberry Preserves


Last year I made these preserves with fresh peaches my daughter brought me.  When the preserves were gone I made more with a bag of frozen peaches.  What a difference, fresh is best!  I've tried to buy them fresh from grocery store but they never seem to ripen before turning bad.  So this year I ordered a box of farm fresh peaches from Pearson's Farm in Georgia.  
They showed up beautifully packed but not quite ripe.  I checked each day and by the 4th day they were perfect to eat.  They are so juicy and taste like a peach should taste!  I used half the box to make preserves to enjoy with homemade yogurt (see recipe here) and we'll just enjoy eating the rest of the peaches with the juice dripping down our chins!  

Here's my recipe for instant pot yogurt. It's so good with a dollop of either the strawberry or peach preserves swirled in and topped my homemade granola.  The preserves are also delicious on a piece of toast!


  • Ingredients:
  • 4 cups (1 1/2 lbs) ripe strawberries, hulled and diced or 4 cups (1 1/2 lbs) ripe peaches, skin removed *see note and diced 

  • 1/2 cup of sugar
  • 1/2 teaspoon grated lemon zest
  • 2 teaspoons fresh lemon juice

  • Instructions:
  1. In a saucepan heat strawberries on medium heat for 5-8 minutes to release their liquid (easier to stir in sugar).
  2. Turn heat down to low, add sugar and stir until dissolved.  Add lemon zest and juice.
  3. Increase heat to medium and bring mixture to a slow boil.
  4. Stir frequently, continuing with a slow boil until jam is thickened about 25-30 minutes **see note.  I don't smash my fruit because I like the diced chunks in my yogurt but smash if you'd like a more jam consistency. 
  5. Transfer jam to tightly lidded jars (leave a little room on top for expansion when freezing) and let cool to room temperature.
  6. When cool store in the refrigerator for about 2 weeks (or freeze for 3 months)
  • Makes about 2 cups 
              * Peel Peaches - Boil a pot of water, large enough to submerge several peaches.  Lower peaches into the boiling water and let them soak for about 30-45 seconds.  Use a slotted spoon to transfer the peaches from the pot into a bowl full of ice water.  Once cooled, the peach skin should be very easy to pull away gently with a knife.

**Additional tip:  If you have a thermometer when the jam reaches 215 F, it’s ready.


Thursday, April 30, 2020

Strawberry or Peach Compote (small batch)

When I started making yogurt in my instant pot awhile back, I've never stopped.  When one batch is gone I make another.  It's not a sweet yogurt and for me, it needs a little sweetness.  I started out with a drizzle of honey, fresh fruit, and my homemade granola.  It's delicious that way but I needed some variety.   Swirling a dollop of homemade fruit compote is just what this yogurt needed!  It's a perfect consistency to swirl in and adds the perfect sweetness.  So far I've made a batch of strawberry and peach.  It's also yummy on toast!

  • Ingredients:
  • 4 cups ripe strawberries, hulled and diced or 4 cups ripe peaches, skin removed *see note and diced 

  • 1/2  cup of sugar
  • 1/2 teaspoon grated lemon zest
  • 2 teaspoons fresh lemon juice

  • Instructions:
  1. In a saucepan heat strawberries on medium heat for 5-8 minutes to release their liquid (easier to stir in sugar).
  2. Turn heat down to low, add sugar and stir until dissolved.  Add lemon zest and juice.
  3. Increase heat to medium and bring mixture to a slow boil.
  4. Stir frequently, continuing with a slow boil until jam is thickened about 25-30 minutes **see note.  I don't smash my fruit because I like the diced chunks in my yogurt but smash if you'd like a more jam consistency. 
  5. Transfer jam to tightly lidded jars (leave a little room on top for expansion when freezing) and let cool to room temperature.
  6. When cool store in the refrigerator for about 2 weeks (or freeze for 3 months)
  • Makes about 2 cups 
              * Peel Peaches - Boil a pot of water, large enough to submerge several peaches.  Lower peaches into the boiling water and let them soak for about 30-45 seconds.  Use a slotted spoon to transfer the peaches from the pot into a bowl full of ice water.  Once cooled, the peach skin should be very easy to pull away gently with a knife.

**Additional tip:  If you have a thermometer when the jam reaches 215 F, it’s ready.

Monday, March 23, 2020

Chicken Mango Avocado Salad


I've been asked what I'm making these days in isolation. Even for me, who enjoys cooking, having to prepare three meals a day and only going to the grocery store as little as possible is a huge ordeal.  I'm used to going to the grocery store almost daily but the new normal is stocking the freezer and using up the fresh ingredients I have so they don't go to waste.  It has taken a lot of organization.  I have a list on my fridge on what leftovers I have and meals I can make.  Each day I look to see what needs to be eaten first.  Today we had yogurt, fruit and granola for breakfast, this salad for lunch (below) and Italian meatloaf with roasted vegetables for dinner.  I got this salad recipe from Natashia's Kitchen.  On her blog, she makes a large salad that serves 8.  Here, I've adjusted it to make 2 meal-size portion salads for my husband and I.  When the day comes that I can have others over for dinner the full size will be on the menu.  It's delicious!  It has chunks of juicy mangos, creamy avocado, crunchy veggies, and the chicken makes it a hearty satisfying meal.  Right now, we all need the extra comfort good food can bring.  In a few days, I'll be back to share with you the instant pot yogurt I've been making.  It too is delicious, so easy and I make it often.  It's nice to always have fresh yogurt in the fridge for breakfast or a healthy snack.  Enjoy and stay healthy!!

I ended up making an extra chicken breast so that I could make it again the next day so to use up the 1/2 avocado and 1/2 mango.
The next day the mango was good but the avocado got a little brown, which was fine but next time I'll just buy a smaller avocado and use it all.  Avocados are best eaten fresh.


Chicken Avocado Mango Salad Ingredients:

  • 1 medium chicken breast (sprinkled with garlic salt and freshly ground pepper)
  • tsp olive oil (I like to use avocado oil as it has a higher smoke point)
  • 3-4 cups romaine lettuce rinsed, chopped and spun dry
  • 1/4 cup cherry tomatoes halved
  • 1/4 cucumber sliced
  • 1//2 mango pitted, peeled and diced
  • 1/2 avocado pitted, peeled and diced (or 1 small)
  • 2 tablespoons red onion, diced 
  • 2 tablespoons cilantro chopped
  • 2 tablespoons almonds toasted, for topping

Honey Vinaigrette Dressing: (I make the full recipe for dressing as it's great on any salad)

  • 1/2 cup olive oil
  • 3 Tbsp apple cider vinegar 
  • 2 tsp dijon mustard 
  • 2 tsp honey 
  • 1 garlic clove - 1 tsp minced
  • 1 tsp kosher salt 
  • 1/4 tsp black pepper 

Instructions

How to Make Chicken Mango Avocado Salad

  1. Cut chicken breast in half lengthwise then season with garlic salt and pepper to taste and saute in oil over medium-high heat until browned and cooked through. Remove from pan, cool for 5 minutes then slice into strips against the grain.

  2. In two large salad bowls, add chopped romaine. Top with cherry tomatoes, sliced cucumber, diced mango and avocado, red onion and cilantro.

How to Make Honey Vinaigrette Dressing:

  1. Combine the Honey Vinaigrette Dressing Ingredients in a bowl and whisk together.  If not using dressing right away, shake well just before serving. Drizzle over salad.